
Mitya Guarantee Bundle
$0.00
Buy
 EN


Mitya converts Superconduct into Stellar-Conduct and uses Gradient Beacons and Detection Cores to power his kit. Holding his Elemental Skill lets him stay on-field and unleash special Charged Attacks, while tapping it creates an off-field Core that contributes damage and Elemental Mastery to other Stellar-Conduct carries.
An on-field Mitya build needs a balance of Elemental Mastery, CRIT and Energy Recharge. An off-field support build places more emphasis on team buffs and support weapons. Prepare your Mitya Materials Guide ahead of time, then choose a build that fits your roster so he is ready to play as soon as you get him.
Already saved a spot for Mitya in your team? Make sure your Primogems are ready, too. Top up Genshin Impact Genesis Crystals on UUTOP to help bring Mitya home, unlock key Constellations, or pick up his signature weapon.
 Genshin Impact
When Mitya is in the party, Superconduct becomes Stellar-Conduct. Triggering the reaction creates a Polestar Field and generates Gradient Beacons that Mitya can carry.
His Elemental Mastery also increases the party's base Stellar-Conduct DMG by 0.028% per point, up to 14%. This team buff reaches its cap at 500 Elemental Mastery. Building 600 EM or more further increases Mitya's own Stellar-Conduct damage.

Holding Mitya's Elemental Skill creates a Detection Core: Overloaded, replacing his Charged Attack with Gradient Detonation. This special Charged Attack consumes no Stamina and spends his Gradient Beacons, dealing an additional instance of Stellar-Conduct damage for each Beacon consumed.
His Elemental Burst instantly creates three Gradient Beacons. Use it after the first special Charged Attack to refill his resources, then follow up with another special Charged Attack.
Personal combo:
Hold Elemental Skill → Special Charged Attack → Elemental Burst → Special Charged Attack
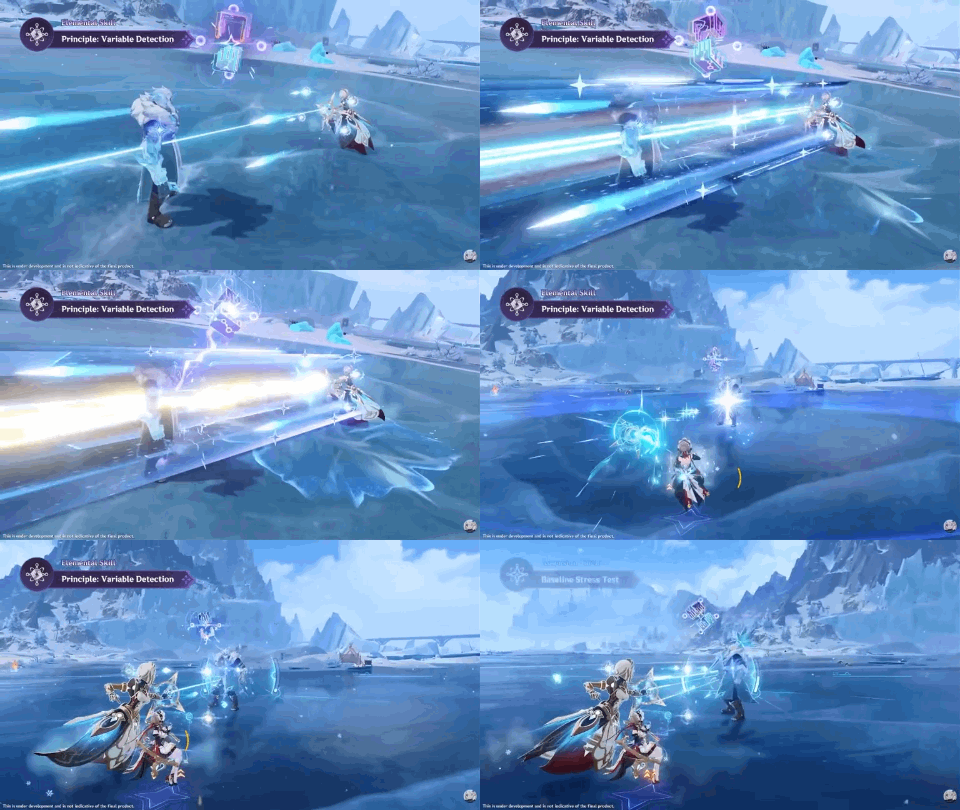
Tapping Mitya's Elemental Skill creates a Detection Core: Steady State. After he leaves the field, the Core continues consuming Gradient Beacons to deal off-field Stellar-Conduct damage.
While the Steady State Core is active, each carried Gradient Beacon grants nearby party members 30 Elemental Mastery. At C0, this provides up to 120 EM. C1 increases his Beacon capacity to five, raising the maximum buff to 150 EM.
For a pure support playstyle, simply tap his Skill and switch characters. His Burst can generate Beacons immediately, but it adds field time and Energy requirements, so there is no need to force it into every rotation.
| Weapon | Rarity | Best Role | Why It Works |
|---|---|---|---|
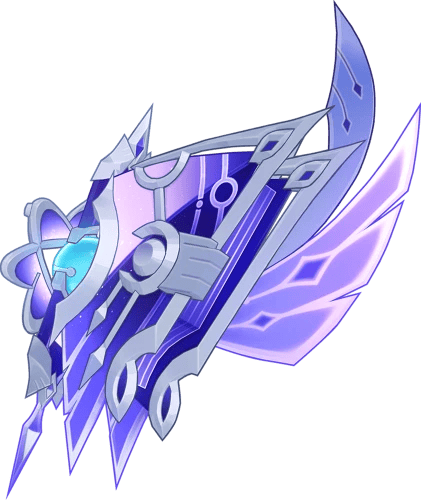 Starsealed Edict | 5-star | On-field DPS | His signature weapon, providing high CRIT DMG, Elemental Mastery and Stellar-Conduct CRIT DMG |
 A Thousand Floating Dreams | 5-star | On-field DPS / Off-field support | A 5-star alternative that provides substantial EM and grants additional EM to teammates |
 Winter's Heavy Heart | 4-star | On-field DPS | Provides EM and Stellar Glimmer reaction DMG bonuses based on the party's Cryo and Electro characters, with better performance at higher refinements |
 Etherlight Spindlelute | 4-star | On-field DPS / F2P option | Combines Energy Recharge with EM, making it useful for C0 Mitya when he needs his Burst every rotation |
 Wandering Evenstar | 4-star | Off-field support | Converts EM into a party ATK buff, making it useful alongside ATK-scaling carries such as Sandrone |
Starsealed Edict is the best choice for maximizing Mitya's personal damage. Alongside its high CRIT DMG, it grants EM after using his Elemental Skill and gains additional EM stacks through party reactions, further improving his Stellar-Conduct damage.
A Thousand Floating Dreams supports both Mitya's own EM needs and his teammates through its EM buff. If you already own it and plan to skip his signature weapon, it is a practical alternative. For on-field builds, make sure your Artifacts provide enough CRIT and Energy Recharge.
Among 4-star weapons, choose a high-refinement Winter's Heavy Heart for on-field damage, or Etherlight Spindlelute when you need more Energy Recharge. For off-field support, Wandering Evenstar turns the EM Mitya already wants into an additional team buff.
| Artifact Set | Why It Works |
 4pc Disenchantment in Deep Shadow | Increases Stellar-Conduct DMG by 40% and grants 16% conditional CRIT Rate against enemies affected by Superconduct or Stellar-Conduct |
 4pc Heart of the Furnace | Increases the party's Stellar Glimmer reaction damage and can trigger from off-field, making it suitable for support builds |
| 2pc EM + 2pc EM | Provides a consistent 160 EM and makes it easier to use pieces with strong substats; works for both playstyles |
Prioritize 4pc Disenchantment in Deep Shadow when building Mitya for personal damage. If its substats are noticeably worse, use a 2pc EM + 2pc EM combination instead of sacrificing EM and CRIT just to complete the set.
Heart of the Furnace's team buff does not stack with another copy of the same set. If Odette or Alyosha already equips it, give Mitya a mixed EM build or Disenchantment in Deep Shadow instead.
| Slot | Recommended Main Stat |
 Sands of Eon | Elemental Mastery; Energy Recharge if the on-field build needs it |
 Goblet of Eonothem | Elemental Mastery |
 Circlet of Logos | CRIT Rate / CRIT DMG; Elemental Mastery for support builds |
On-field substat priority:
Meet Energy Recharge requirements > Elemental Mastery / CRIT
Off-field substat priority:
Elemental Mastery > CRIT
Mitya's main Stellar-Conduct damage scales with EM, making an EM Goblet more suitable than an Electro DMG Goblet. When using Wandering Evenstar, an EM Circlet also increases the weapon's team ATK buff.
| Stat | On-Field DPS | Off-Field Support |
| Elemental Mastery | Start at 500; aim for 600+ | 500–600+ |
| Energy Recharge | Around 140–160% at C0; lower with multiple Electro teammates or C1 | No extra investment needed if Burst is not a regular part of the rotation |
| CRIT Rate | Around 50–60% with 4pc Disenchantment in Deep Shadow | Adjust according to personal damage investment |
| CRIT DMG | Around 160–180% or higher | Build after reaching your EM target |
Mitya's passive grants up to 20% CRIT Rate, while Disenchantment in Deep Shadow provides another 16% conditional CRIT Rate. With both effects active, 50% displayed CRIT Rate becomes 86% effective CRIT Rate. If you switch to a mixed EM build, increase his displayed CRIT Rate accordingly.
On-field DPS:
Normal Attack (Lv. 9) > Elemental Skill (Lv. 9) > Elemental Burst (Lv. 6)
Gradient Detonation scales with his Normal Attack Talent, so level that first. His Burst primarily replenishes Gradient Beacons and can receive investment later.
Off-field support:
Elemental Skill (Lv. 9) > Normal Attack (Lv. 1) = Elemental Burst (Lv. 1)
His off-field damage comes mainly from the Steady State Core, making his Skill the priority. A pure support build does not need to be triple-crowned.
Rotation notation: E = Elemental Skill, Q = Elemental Burst, C = Charged Attack, HE = Hold Skill, and TE = Tap Skill. Actions in parentheses are optional, depending on available Energy.
Mitya + Odette + Yae Miko + Valeriy
 Mitya |  Odette |  Yae Miko |  Valeriy |
Odette supplies Cryo application and reaction buffs, Yae Miko contributes off-field damage and Electro particles, and Valeriy provides shielding and buffs so Mitya can complete his special Charged Attacks reliably.
Rotation: Yae Miko EEE → Odette EE → Valeriy EQ → Mitya HE C Q C
Sandrone + Yae Miko + Odette + Mitya
 Sandrone |  Yae Miko |  Odette |  Mitya |
Rotation: Yae Miko EEE → Odette EE → Mitya TE (Q) → Sandrone CE CE Q CE
Mitya + Diona + Cryo Traveler + Sucrose
 Mitya |  Diona |  Cryo Traveler |  Sucrose |
Diona provides shielding and healing, Cryo Traveler adds Cryo application, and Sucrose offers grouping, EM buffs and Viridescent Venerer RES shred. This lineup suits Travelers who do not have additional limited 5-star teammates.
Rotation: Diona EQ → Cryo Traveler EQ → Sucrose EQ → Mitya HE C Q C
| Constellation | Main Benefits | Pull Recommendation |
| C1 | Increases Beacon capacity, creates an extra Beacon with his Skill, buffs the active character's CRIT DMG and restores Mitya's Energy | Improves Energy and resource management for both playstyles |
| C2 | Reduces enemy Cryo and Electro RES, then grants partywide or active-character EM depending on the Core's state | A strong investment target for both personal damage and team support |
| C6 | Strengthens Core damage and Beacon generation while increasing the party's Stellar-Conduct damage | Suited to Travelers investing heavily in Mitya |
C0 already provides both on-field and off-field playstyles. C1 offers more immediate improvements to Energy and Beacon management, while C2 adds RES shred and a substantial EM buff that benefits both roles.
His signature weapon mainly improves personal damage, while early Constellations also improve gameplay and team buffs. Consider C1 or C2 if you plan to use both playstyles. If you are staying at C0 and playing him on-field, decide whether to pull his signature based on the weapons you already own.
TOP UP GENSHIN IMPACT ON UUTOP

Elemental Mastery is the foundation of a good Mitya build. On-field Mitya prioritizes his Normal Attack Talent and uses a held Skill followed by special Charged Attacks. Off-field Mitya prioritizes his Skill, taps it, and switches to the team's main DPS. Choose Disenchantment in Deep Shadow or Heart of the Furnace according to his role, while a mixed 2pc EM + 2pc EM build remains practical with strong substats.
Good luck with your pulls, Travelers. May you win your 50/50 and bring Mitya home early in Version 7.2!
Violet is a gaming content writer specializing in HoYoverse titles, gacha games, and popular live-service games. From character builds and update guides to in-game currency explanations, Violet turns complex information into clear, practical advice. With a strong focus on accuracy, value, and player needs, each guide is designed to help players save time, manage resources wisely, and enjoy a smoother gaming experience.


