-10%


All-In-One Bundle
$189.15$200.94
Buy
 EN


Sunbringer is stepping into the spotlight in Zenless Zone Zero Version 3.4. Eldreda, Lindverne, and Dracaene will fight together as one playable Agent, bringing the new Void Hunter's three-in-one combat style to your squad.
If Sunbringer is on your pull list, here's how to get her build ready. This Sunbringer build guide covers her best W-Engines, Drive Discs, stats, and teams, plus skill priorities and early Mindscapes. New to ZZZ? We've also included a starter team with free teammates, so Sunbringer is the only character you need to pull.
Sunbringer is currently in testing ahead of Version 3.4. Skill effects, equipment names, and recommendations may change before her official release.
Preparing for Sunbringer's arrival? Top up Zenless Zone Zero on UUTOP to add Monochromes and convert them into Polychromes for your Signal Searches.
 Zenless Zone ZeroTop Up Now 10% Off

| Build Component | Recommendation |
|---|---|
| Recommended W-Engine | Sunbringer signature Armorer W-Engine |
| Recommended Drive Discs | 4-piece Rank Stele + 2-piece Thorned Rose or Soul Rock |
| Disc 4 | CRIT Rate |
| Disc 5 | Fire DMG Bonus; PEN Ratio as an alternative |
| Disc 6 | DEF% |
| Priority Substats | CRIT Rate and DEF%, followed by CRIT DMG |
| Skill Priority | Core Skill > Special Attack > Chain Attack > Basic Attack > Assist > Dodge |
| Recommended Team | Sunbringer + Norma + Robin |
Sunbringer is a Void Hunter and the first Enchainer Agent, arriving in Zenless Zone Zero Version 3.4. Her combat data classifies her as an S-Rank Armorer using Genesis Flare, a Fire-based attribute.
She fills the main DPS position. Her skills use DEF as their damage multiplier, giving DEF buffs direct offensive value.
Eldreda, Lindverne, and Dracaene form one playable Agent, with each handling a different part of the shared kit.
| Character | Combat Function |
|---|---|
 Lindverne | Fast attacks, coordinated EX Special Attacks, and the first Ultimate |
 Dracaene | Parries, Defensive Assists, and defensive follow-ups |
 Eldreda | Heavy attacks, Converging Edge, and Ember Scar finishers |
Sunbringer occupies one squad position. The other two teammates can provide Daze, buffs, and protection while all three Sunbringers participate through the same kit.

Press Basic Attack to perform Lindverne's or Eldreda's four-hit combo. These sequences help build Gash, while the final heavy hit consumes Gash stacks to trigger Maim and generate Wishfire.
During Lindverne's fourth attack, repeatedly press or hold Basic Attack to extend her slash.

When Wishfire reaches 120, hold Basic Attack to activate Bannerbearer - Converging Edge.
Eldreda enters with an empowered attack, consuming 120 Wishfire and granting Chain Teeth and Flag Order for enhanced coordinated attacks.

When Sharpness is available, press Special Attack to launch an EX Special Attack. Its heavy hit can consume Gash and trigger additional Maim damage.
Chain Teeth and Flag Order unlock stronger follow-ups. The finisher of EX Special Attack: Kindled Lamp - Torch of Eternal Day also settles accumulated Ember Scar.

With Lindverne active and Decibels at maximum, use Onward, Together. Holding Flag Order allows this Ultimate to convert it into Wish Core.

Wish Core enables Eldreda's By This Wish, All Things Remade, which delivers a finishing attack and settles Ember Scar.
Sunbringer benefits from Armorer W-Engines that provide DEF, CRIT Rate, and bonuses to Sharp DMG. The effects below refer to Phase 1.

Sunbringer's signature is the recommended option because its bonuses directly support her damage scaling and critical mechanics.
At Lv.60, it provides 446 Base DEF and 48% DEF. Its passive adds 20% CRIT Rate, plus 20% Fire DMG and 10% Fire Sharp DMG while its buff is active.
The buff activates upon entering combat and after an EX Special Attack, lasting 25 seconds. Her regular EX Special Attacks refresh its duration throughout combat.
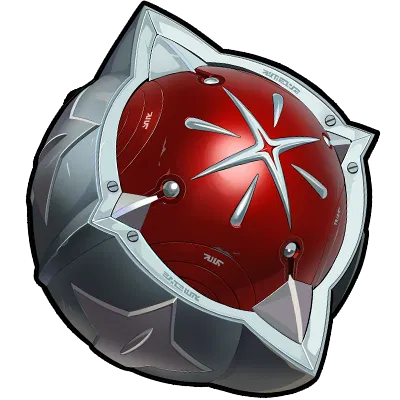
Bloodmarrow Coffer provides 20% CRIT Rate at Lv.60. For each percentage point of CRIT Rate above 100%, its passive grants 0.48% additional damage, up to 24%.
The weapon bonus reaches its maximum at 150% effective CRIT Rate, making it useful for builds with substantial CRIT Rate from equipment and combat buffs.

Candlelit Scheme provides 40% DEF at Lv.60. After an EX Special Attack, it grants 8% CRIT Rate for 40 seconds and increases damage against enemies below 50% HP by 15%.
Its DEF and CRIT bonuses support Sunbringer throughout combat, while its additional damage bonus helps finish weakened enemies.
| Four-Piece Set | Two-Piece Pairing | Main Benefits |
|---|---|---|
| Rank Stele | Thorned Rose or Soul Rock | DEF, CRIT Rate, and enemy DEF ignore for Fire Sharp DMG |
 Thorned Rose | Soul Rock | DEF, increased damage, and CRIT Rate based on initial DEF |
Rank Stele
Rank Stele provides 16% DEF from its two-piece effect. Its four-piece effect adds 12% CRIT Rate and allows Fire Sharp DMG to ignore 16% of enemy DEF.
Pair it with two pieces of Thorned Rose or Soul Rock for another 16% DEF. Both provide the same two-piece bonus, so the difference comes from their main stats and substats.
Thorned Rose
Thorned Rose is an alternative four-piece set. It provides 16% DEF, 15% increased damage, and additional CRIT Rate based on initial DEF:
| Slot | Recommended Main Stat | Reason |
|---|---|---|
| Disc 4 | CRIT Rate | Supports critical hits and additional Laceration checks |
| Disc 5 | Fire DMG Bonus | Increases her Fire-based damage |
| Disc 6 | DEF% | Strengthens her DEF-scaling Sharp DMG |
PEN Ratio is an alternative for Disc 5. Its value depends on the complete build and team, including Sunbringer's existing DEF ignore.
DEF% remains the recommended Disc 6 main stat. Her EX Special Attacks use Sharpness, so Energy Regen is not a priority for her personal build.
CRIT Rate / DEF% > CRIT DMG > flat DEF / PEN
CRIT Rate and DEF% are the main priorities. Initial CRIT DMG also contributes through conversion: every 1% initial CRIT DMG grants 0.35% initial CRIT Rate.
Sharp critical hits use Laceration DMG Bonus. CRIT Rate above 100% can enable an additional Laceration check, giving excess CRIT Rate offensive value.
Drive Disc substats provide flat PEN, while PEN Ratio is available as a Disc 5 main stat.
| Stat | Practical Target |
|---|---|
| Effective CRIT Rate | 100%+ during combat, with further investment supporting additional Laceration checks |
| DEF | DEF% on Disc 6 and useful DEF% substats |
| Initial DEF with 4-piece Thorned Rose | At least 1,800 for its full CRIT Rate bonus |
| Effective CRIT Rate with Bloodmarrow Coffer | 150% activates its maximum Phase 1 damage bonus |
| CRIT DMG | Contributes through initial CRIT Rate conversion |
Midnight Sun adds 40% CRIT Rate during combat. For example, a pre-combat total of 70%, after accounting for equipment and conversion effects, becomes 110% with Midnight Sun active.
Core Skill > Special Attack > Chain Attack > Basic Attack > Assist > Dodge
Prioritize the Core Skill and Special Attack, which support her central mechanics and coordinated attacks.
Chain Attack upgrades also improve her Ultimates. Basic Attack strengthens her regular sequences and Converging Edge.
Assist and Dodge can follow. Assist becomes more valuable when Dracaene's parries and follow-up attacks feature heavily in your gameplay.
 Sunbringer |  Norma |  Robin |
A hypercarry team that keeps Sunbringer active while Norma contributes through her creations and Robin provides DEF buffs and shielding.
Norma helps build Daze from off-field and improves the damage opportunity created by Stun. Sunbringer can continue building resources while Norma's creations contribute, giving the lineup sustained support without frequent interruptions to her field time.
| Sunbringer |  Roxy | Robin |
Roxy provides Stun support and attribute-based damage buffs, while Robin supplies DEF buffs and protection.
Roxy's Contamination and Cleanse interactions grant Laceration bonuses for the corresponding attribute. Maintaining the Fire-related bonus strengthens Sunbringer's attacks, adding an attribute-based support layer alongside the team's Stun windows.
 Sunbringer |  Anby |  Nicole |
A beginner-friendly team that only requires pulling Sunbringer. Anby and Nicole are obtained for free during the early game, making this lineup suitable for players who have just started Zenless Zone Zero.
Anby provides Stun and meets Sunbringer's Additional Ability requirement. Nicole contributes grouping and DEF reduction, helping Sunbringer damage enemies gathered together. The team provides a complete starting lineup without requiring another limited character pull.
The Reclusive Void Hunter
Grants 120 Wishfire upon battlefield entry, increases Gash Buildup Rate by 10%, and allows skill damage to ignore 15% of enemy Fire RES. The entry effect has a 180-second cooldown in Investigation Zone mode.
The Heir's Banner of Rebellion
Increases Ember Scar accumulation by 20% and allows other damaging skills to record Ember Scar equal to 15% of their actual damage. It also enables execution against normal enemies and Elites when stored Ember Scar reaches their remaining HP.
M1 offers immediate Converging Edge access and Fire RES ignore. M2 adds further Ember Scar benefits. For a new account, M0 with a complete team is the recommended starting point.
TOP UP ZENLESS ZONE ZERO ON UUTOP
Yes. As one of ZZZ
Her Sharp DMG scales with DEF. Prioritize DEF% over ATK% for her personal damage.
Her signature is the recommended option. Bloodmarrow Coffer, Candlelit Scheme, and Catty Luck are alternatives.
Use 4-piece Rank Stele + 2-piece DEF. 4-piece Thorned Rose + 2-piece Soul Rock is an alternative.
Build Sunbringer around DEF, effective CRIT Rate, and Fire Sharp DMG. Her signature W-Engine and Rank Stele provide a dedicated setup, while alternative Armorer W-Engines and Thorned Rose offer other equipment options.
Pair her with Norma or Roxy alongside Robin, or start with Anby and Nicole for a team that only requires pulling Sunbringer. Good luck to every Proxy hoping to bring her home!
Violet is a gaming content writer specializing in HoYoverse titles, gacha games, and popular live-service games. From character builds and update guides to in-game currency explanations, Violet turns complex information into clear, practical advice. With a strong focus on accuracy, value, and player needs, each guide is designed to help players save time, manage resources wisely, and enjoy a smoother gaming experience.


